Ubuntu16.04 64 位
Nginx + Php-fpm + MySQL
WordPress.com 是一个博客寄存服务站点,由 Automattic 公司所持有。2005 年 8 月 8 日进行 Beta 测试,2005 年 11 月 21 日向公众开放。它使用的是开源博客软件 WordPress。
环境设置
- 软件安装
$ apt-get update
$ apt-get install mysql-server mysql-client php7.0-fpm nginx
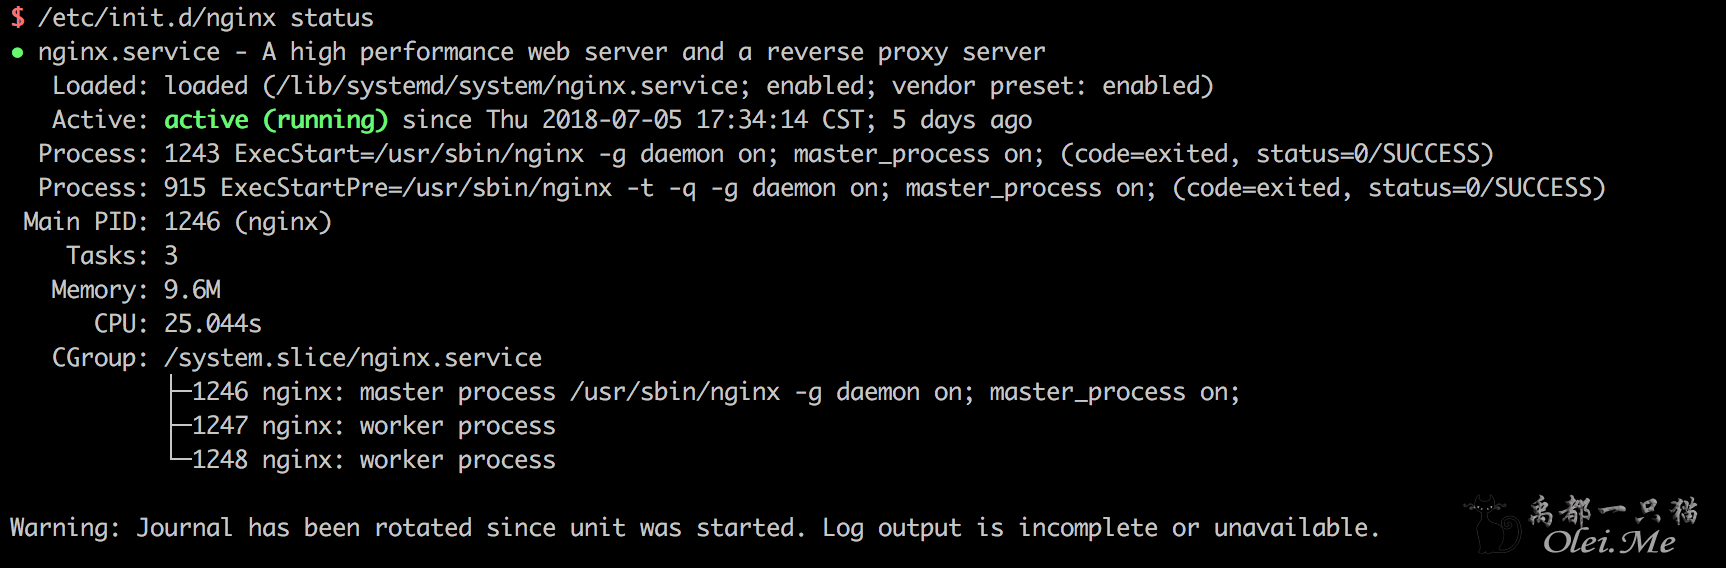
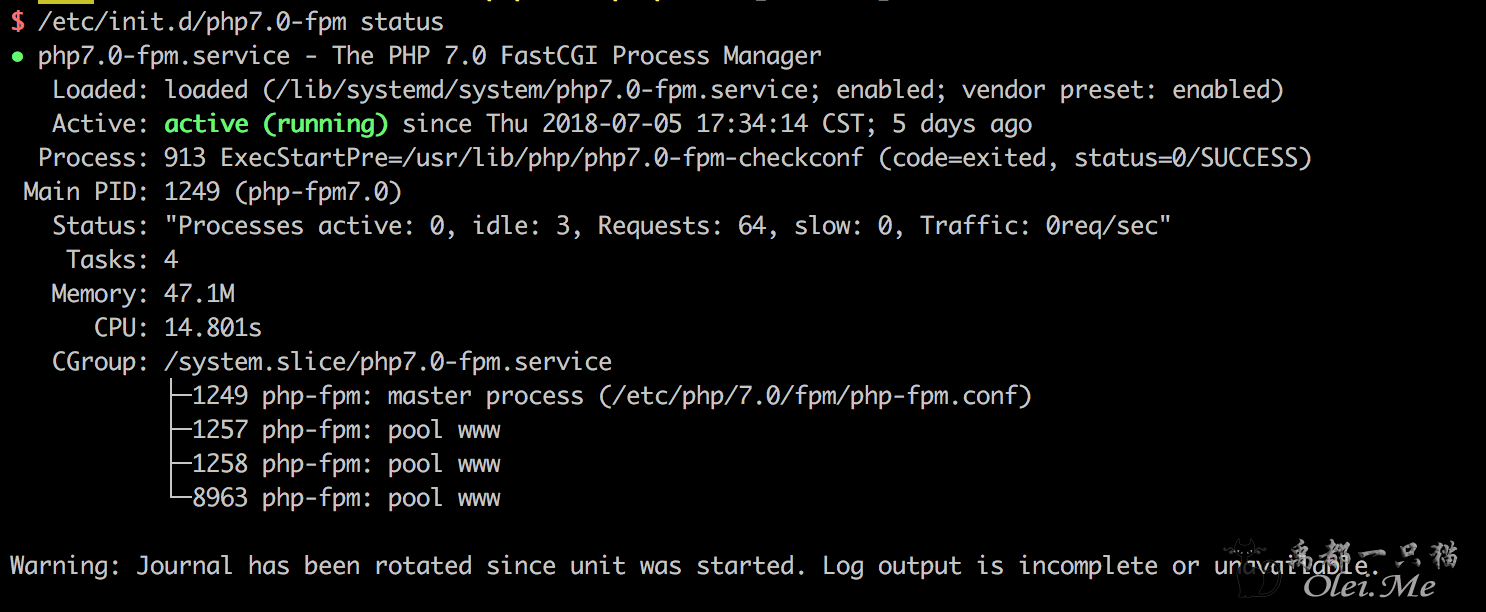
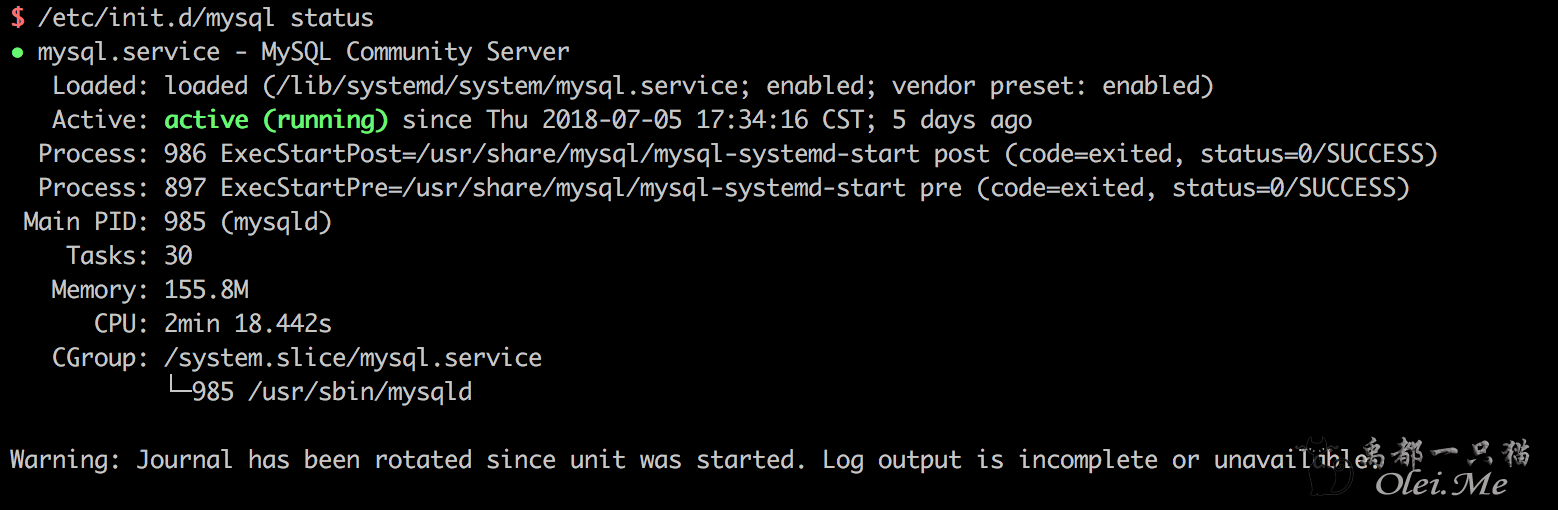
- 安装好了之后,可以查看这个程序是否在运行
$ /etc/init.d/nginx status
$ /etc/init.d/php7.0-fpm status
$ /etc/init.d/mysql status
mysql 安装过程中会让你填写一下 root 密码,为了简便,程序安装的时候就用 root 了,我们在 mysql 命令行创建一个 wordpress 数据库
$ mysql -uroot -proot
mysql> create database wordpress;
mysql> exit
- 修改一些配置文件
php-fpm 代理运行的 php 程序,监听的东西我们改为 127.0.0.1:9000
$ cd /etc/php/7.0/fpm/pool.d
$ vim www.conf
找到 listen = /run/php/php7.0-fpm.sock 这一行,更换为 listen = 127.0.0.1:9000
重启 php-fpm
$ /etc/init.d/php7.0-fpm restart
WordPress 程序
下载并解压
$ cd /var/www
$ wget https://wordpress.org/latest.zip
$ unzip latest.zip
$ chown -R www-data:www-data wordpress
遇到提示 wget 或者 unzip 命令不存在运行
$ apt-get install wget zip unzip -y
nginx 配置
- 创建 wordpress 的配置文件
$ cd /etc/nginx/conf.d
$ touch wordpress.conf
$ vim wordpress.conf
把下面的配置语句复制进去,保存 (仅 http,https 的详见:点我)
server {
  listen 80;
  root /var/www/wordpress;  # 项目目录
  index index.html index.php;
  server_name xxx.xxx.xxx.xxx; # 绑定的域名或者 ip
  server_tokens off;


    location ~* .(jpg|jpeg|png|gif|ico|css|js)$ {
        expires max;
        add_header Cache-Control public;
        access_log off;
    }

    location / {
        try_files $uri $uri/ /index.php?$query_string;
        autoindex on;

        location ~ \.php$ {
            fastcgi_pass   127.0.0.1:9000;
            fastcgi_index  index.php;
            include        fastcgi_params;
            fastcgi_param  SCRIPT_FILENAME  $realpath_root/$fastcgi_script_name;
        }
    }

    location ~ /\.ht {
        deny all;
    }
}
- 重启 nginx
$ /etc/init.d/nginx restart
显示绿色 OK,就通过,没显示 OK,显示红色 Faild,通过下面的方式检测那里出错
$ nginx -t
安装
访问
http://xxx.xxx.xxx(xxx 为 nginx 配置的 IP 或者域名,注意域名的话需要 A 解析到服务器 IP 上)
安装图片不贴了,具体就是输入站点,还有设置后台密码,最重要的是数据库这里,数据库名,用户名以及数据库密码要写对,正确的话,会一路畅通,错误的话,会卡住,具体问题具体分析
注意
安装好之后,后台要设置升级之类的话,需要提供 ftp,为了解决如此麻烦,使用下面方式处理
- 修改下 Wordpress 的配置文件,wp-config.php,加入这么一行
define('FS_METHOD', "direct");
声明
- 本教程适用于任何 php 的网站程序的部署安装!
- 本站使用 Wordpress 创建
本文作者为 olei,转载请注明。